MySQL is an Open source Database Management system(RDBMS -Relation Database Management system).Its one of the popular database system. Its is used supported Linux and windows operating system. This tutorial we will see how to install MySQL 8.0.14 and 8.0.x version from MySQL-rpm tar file.
Before doing fresh installation please update your Ec2 centos 7 Linux machine
yum update -yWe need to remove MariaDB plugins from our server .its will be conflict with MySQL installation.so we need to remove MariaDB plugins.
yum remove mariadb*The wget is utility for downloading files from the Internet. so we need to install this in our server .
yum install wgetAfter the system is updated and MariaDB plugins removed then we need to download the MySQL repositories
rpm -ivh https://dev.mysql.com/get/mysql80-community-release-el7-3.noarch.rpmNow we Need to download MySQL tar ball file from MySQL official site.

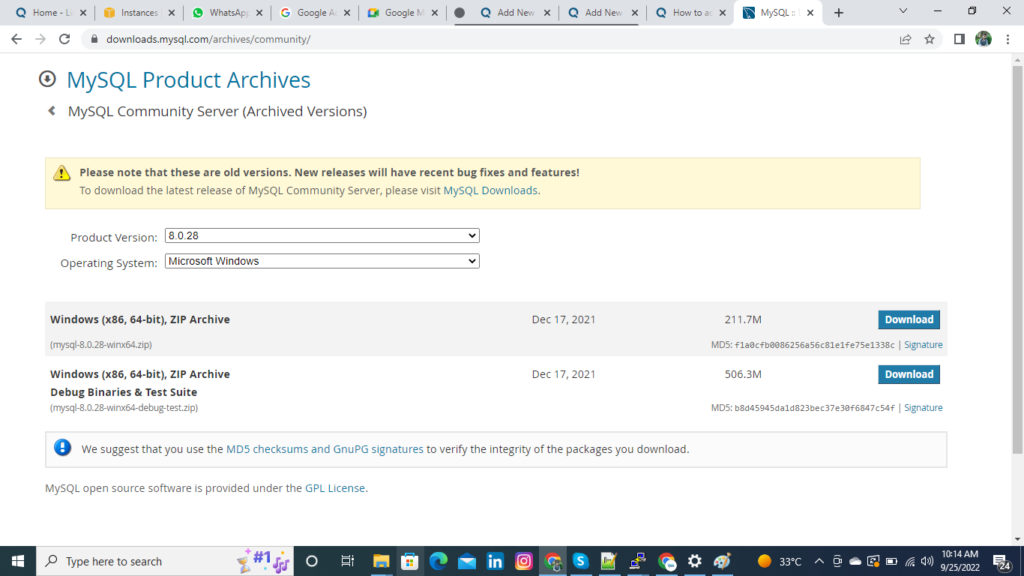
https://downloads.mysql.com/archives/community/ please use this link for download your target version MySQL version and operating system . Here i have downloaded MySQL 8.0.14 version for my requirement.
wget https://downloads.mysql.com/archives/get/p/23/file/mysql-8.0.14-1.el7.x86_64.rpm-bundle.tarExtract the downloaded file in your local Linux directory .
tar -xvf mysql-8.0.14-1.el7.x86_64.rpm-bundle.tarCheck the list of extracted files list using below command
[root@ip-172-31-39-126 ~]# ls

mysql-8.0.14-1.el7.x86_64.rpm-bundle.tar mysql-community-libs-8.0.14-1.el7.x86_64.rpm
mysql-community-client-8.0.14-1.el7.x86_64.rpm mysql-community-libs-compat-8.0.14-1.el7.x86_64.rpm
mysql-community-common-8.0.14-1.el7.x86_64.rpm mysql-community-server-8.0.14-1.el7.x86_64.rpm
mysql-community-devel-8.0.14-1.el7.x86_64.rpm mysql-community-test-8.0.14-1.el7.x86_64.rpm
mysql-community-embedded-compat-8.0.14-1.el7.x86_64.rpm
Now you can see MySQL rmp file list in your MySQL server a list of packages .you Need to choose which rpm files are you are going install in your machine .Here i am going to use local installation method . Type y and press ENTER for each of the requests.
$ yum localinstall mysql-community-common-8.0.14-1.el7.x86_64.rpm

$ yum localinstall mysql-community-libs-8.0.14-1.el7.x86_64.rpm

$ yum localinstall mysql-community-client-8.0.14-1.el7.x86_64.rpm

$ yum localinstall mysql-community-server-8.0.14-1.el7.x86_64.rpm
Once you have MySQL ready on CentOS 7, it does not automatically start right after the installation. Therefore, you need to start it manually through the following command. Then check MySQL server status also .
$ systemctl start mysqld

$ systemctl status mysqld
Now we have installed MySQL server so we need to configure MySQL server. When install MySQL it’s generating root temporary password in your Linux machine .
$ grep "temporary password" /var/log/mysqld.logMySQL includes a security script to change some of the less secure default options for things modify root user. First step you need to enter New temprory password from which one we grep the log file . second and Third step need to Enter new root user password. Then remove anonymous ,remote login and test database also .So that you need to type “y” for steps .
$ mysql_secure_installation[root@ip-172-31-39-126 ~]# mysql_secure_installation
Securing the MySQL server deployment.
Enter password for user root:
The existing password for the user account root has expired. Please set a new password.
New password:
Re-enter new password:
The 'validate_password' component is installed on the server.
The subsequent steps will run with the existing configuration
of the component.
Using existing password for root.
Estimated strength of the password: 100
Change the password for root ? ((Press y|Y for Yes, any other key for No) : n
... skipping.
By default, a MySQL installation has an anonymous user,
allowing anyone to log into MySQL without having to have
a user account created for them. This is intended only for
testing, and to make the installation go a bit smoother.
You should remove them before moving into a production
environment.
Remove anonymous users? (Press y|Y for Yes, any other key for No) : y
Success.
Normally, root should only be allowed to connect from
'localhost'. This ensures that someone cannot guess at
the root password from the network.
Disallow root login remotely? (Press y|Y for Yes, any other key for No) : y
Success.
By default, MySQL comes with a database named 'test' that
anyone can access. This is also intended only for testing,
and should be removed before moving into a production
environment.
Remove test database and access to it? (Press y|Y for Yes, any other key for No) : y
- Dropping test database...
Success.
- Removing privileges on test database...
Success.
Reloading the privilege tables will ensure that all changes
made so far will take effect immediately.
Reload privilege tables now? (Press y|Y for Yes, any other key for No) : y
Success.
All done!
Next step you Need to validate your MySQL Database using your current root user password.
mysql-uroot -p
password:
Check the MySQL version using following command . please execute this command in MySQL query terminal .
mysql> \s
--------------
mysql  Ver 8.0.14 for Linux on x86_64 (MySQL Community Server - GPL)

Connection id:          11
Current database:
Current user:           root@localhost
SSL:                    Not in use
Current pager:          stdout
Using outfile:          ''
Using delimiter:        ;
Server version:         8.0.14 MySQL Community Server - GPL
Protocol version:       10
Connection:             Localhost via UNIX socket
Server characterset:    utf8mb4
Db     characterset:    utf8mb4
Client characterset:    utf8mb4
Conn.  characterset:    utf8mb4
UNIX socket:            /var/lib/mysql/mysql.sock
Uptime:                 2 min 54 sec

Threads: 2  Questions: 15  Slow queries: 0  Opens: 126  Flush tables: 2  Open tables: 102  Queries per second avg: 0.086
--------------
Thanks for read my blog . please post your queries here in comment section . If anything please reach me out in LinkedIn.
https://www.linkedin.com/in/siva-pradeep-2a4b89161https://www.linkedin.com/in/siva-pradeep-2a4b89161


